Creating Custom Views
Overview
Custom views let you add external content to your dashboard. Embed monitoring tools, documentation, or any web content directly in the RosettaHub Federated Dashboard alongside your RosettaCloud and RosettaOps views.
Prerequisites
- [ ] RosettaHub account
- [ ] Understanding of basic dashboard navigation (Getting Started)
View Types
RosettaHub supports four view types:
| Type | Description | Use Case |
|---|---|---|
| URL View | Embeds an external webpage via iframe | Grafana, Jenkins, documentation sites |
| HTML View | Custom HTML content rendered directly | Announcements, widgets, quick notes |
| Artifact View | A view linked to a specific platform artifact | Dedicated views for formations, images, org charts |
| Component View | Built-in RosettaHub views | Standard platform functionality (formations, sessions, etc.) |
URL and HTML views are created manually from the Create View dialog. Artifact views are created from the context menu of any artifact. Component views are the built-in views that ship with the platform.
Creating a URL View
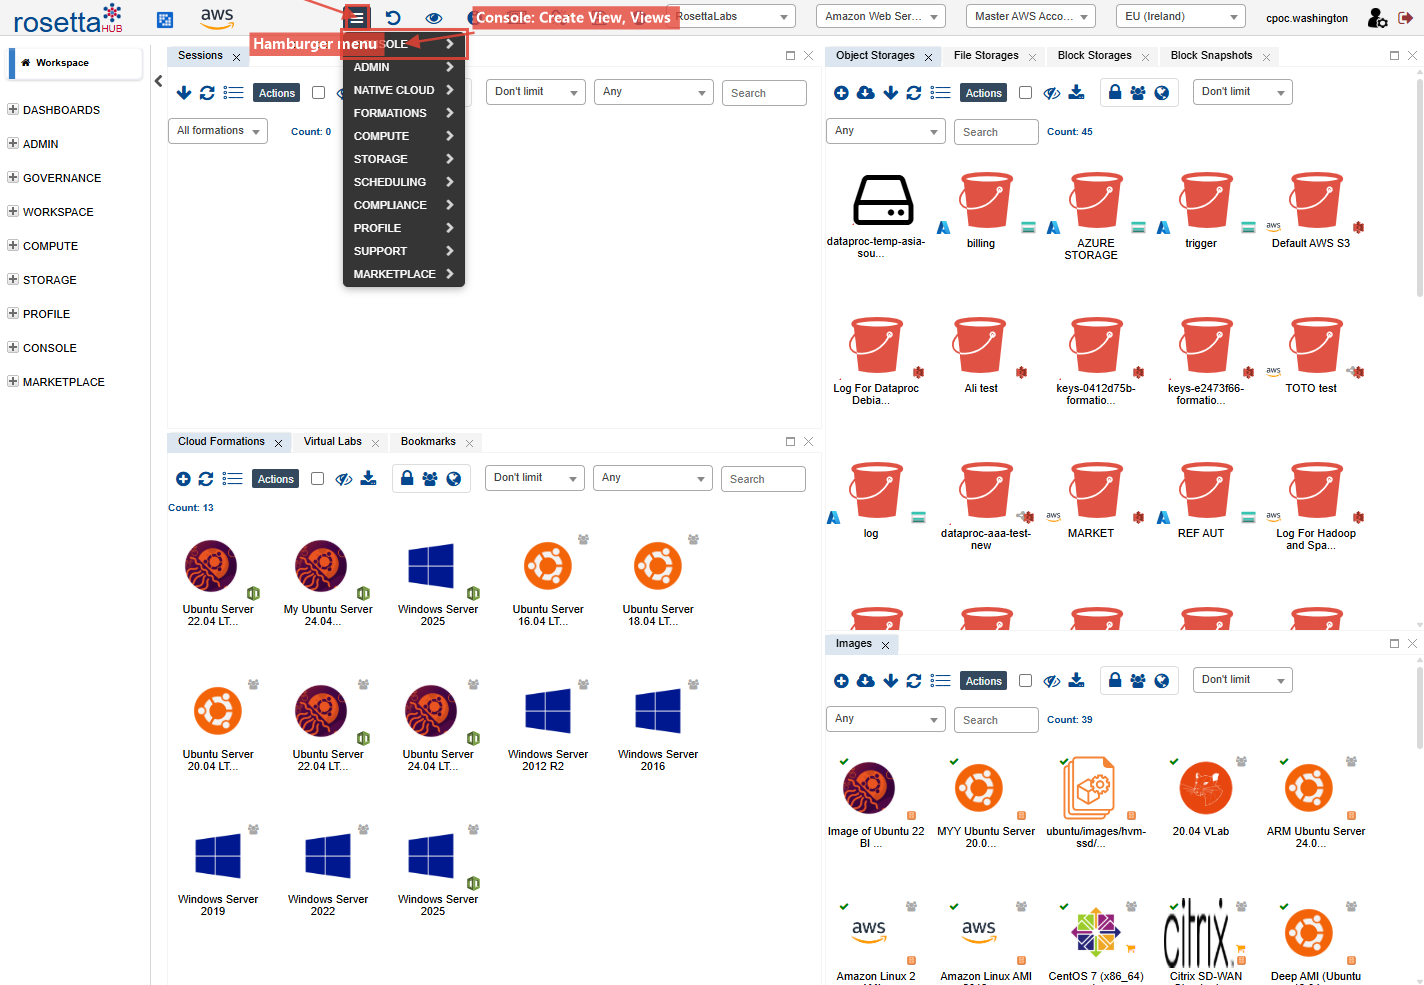
Step 1: Open the Views List
Navigate to the Views view (available in the CONSOLE category of the left pane, or via the hamburger menu). Click the + button to create a new view.
Step 2: Choose View Type
In the Create View dialog, select URL from the Type dropdown.
| Field | Description |
|---|---|
| Label | Display name for the view tab |
| Type | URL or HTML |
| Content | The URL to embed (for URL views) or HTML markup (for HTML views) |

Step 3: Configure the URL
Enter a Label (e.g., "Grafana Dashboard") and the full URL to embed in the Content field.
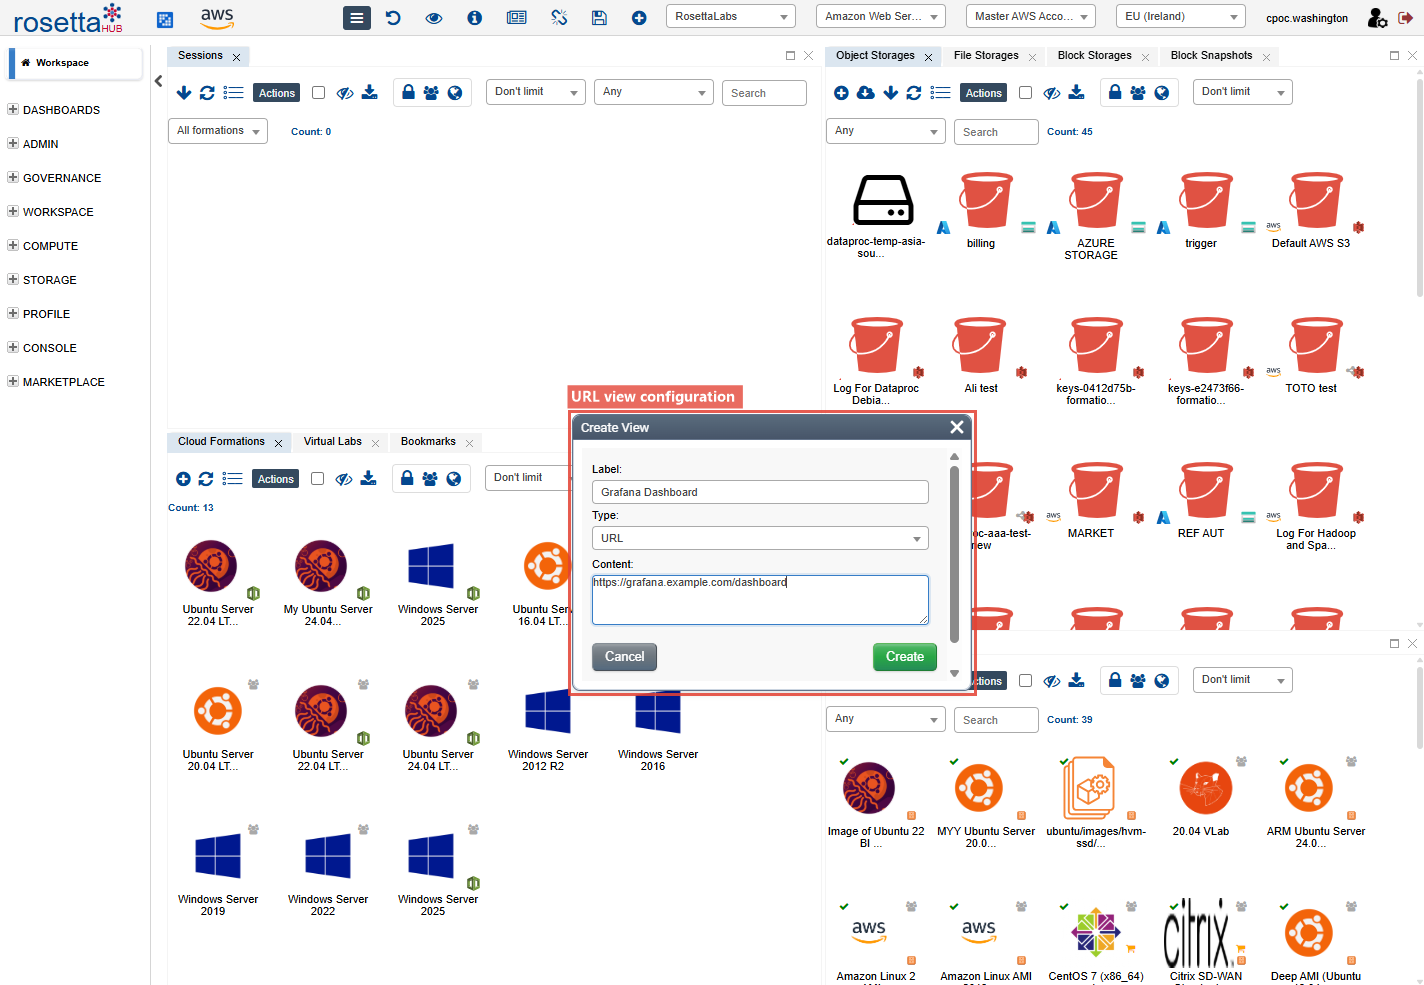
Tip
Use HTTPS URLs. The target site must allow embedding (its X-Frame-Options header must not block iframes).
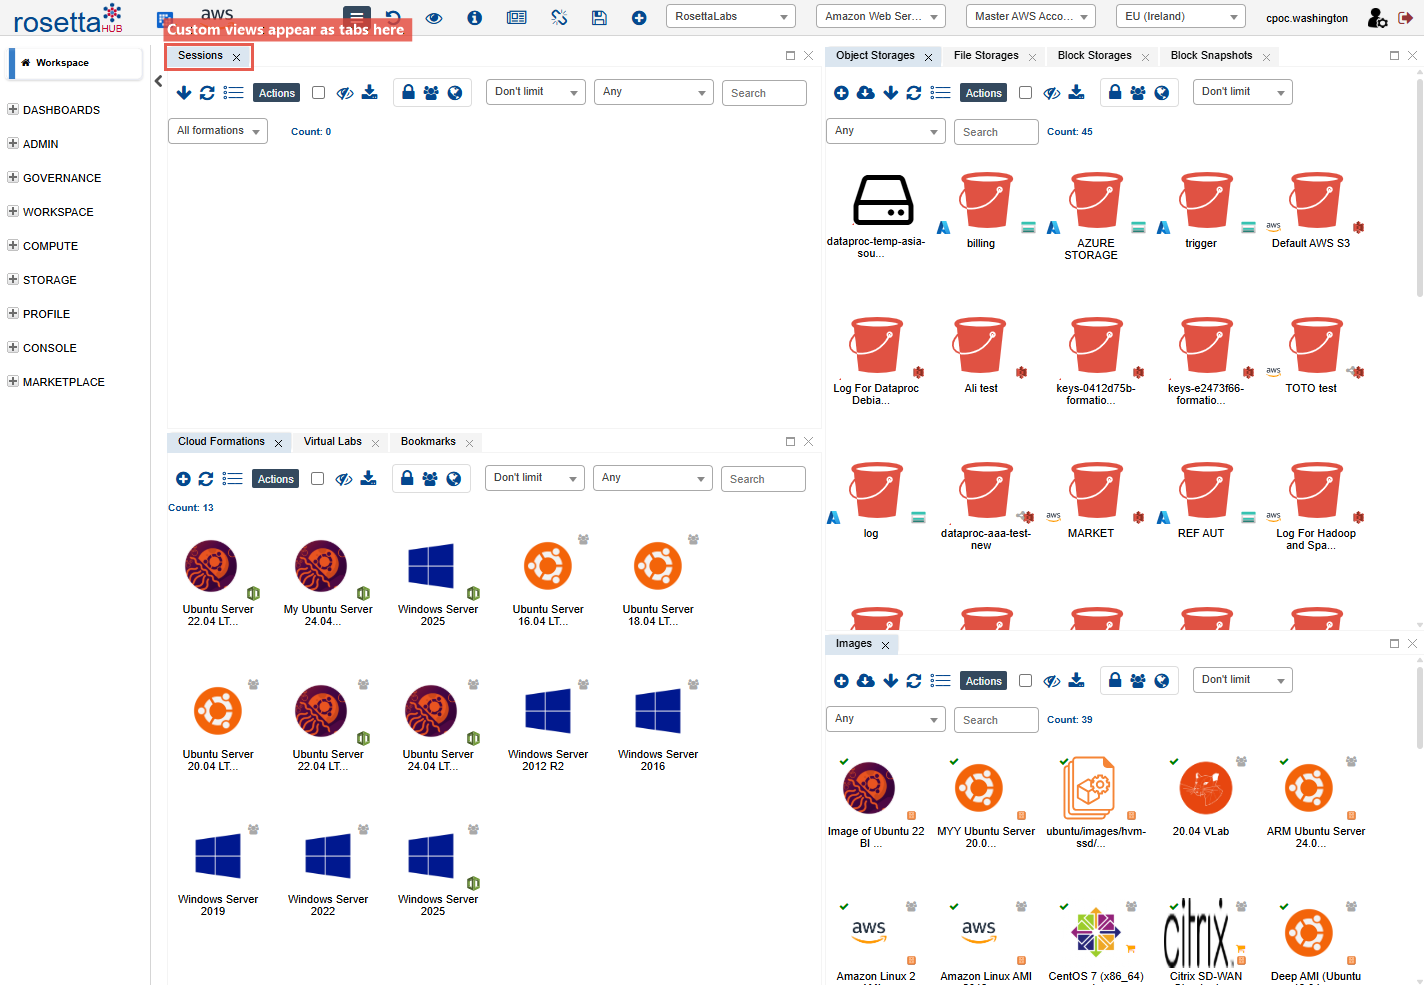
Step 4: View the Result
Click Create. The new view appears as a tab in your current perspective. The external page loads inside an iframe within the dashboard.
Creating an HTML View
Step 1: Select HTML Type
Open the Create View dialog and select HTML from the Type dropdown.
Step 2: Enter HTML Content
Enter a Label and paste your HTML into the Content field:
<div style="padding: 20px; text-align: center;">
  <h2>Team Announcements</h2>
  <p>Sprint planning: Monday 10 AM</p>
  <p>Release: Friday 5 PM</p>
</div>
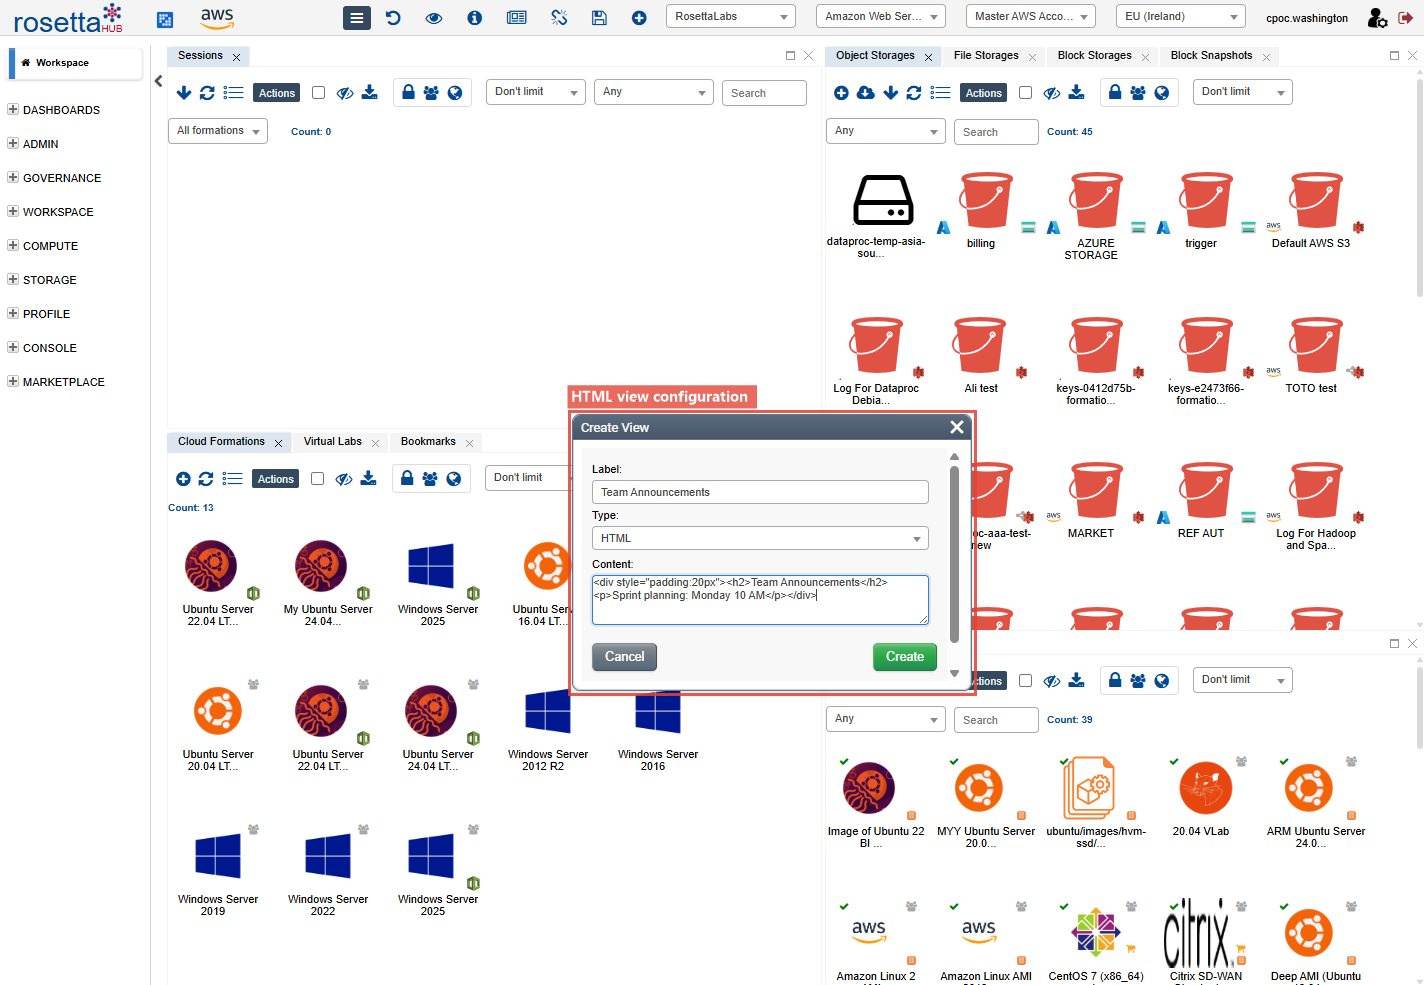
Click Create to add the view.
Creating an Artifact View
Artifact views are created directly from any artifact's context menu. They create a dedicated view linked to that specific artifact.
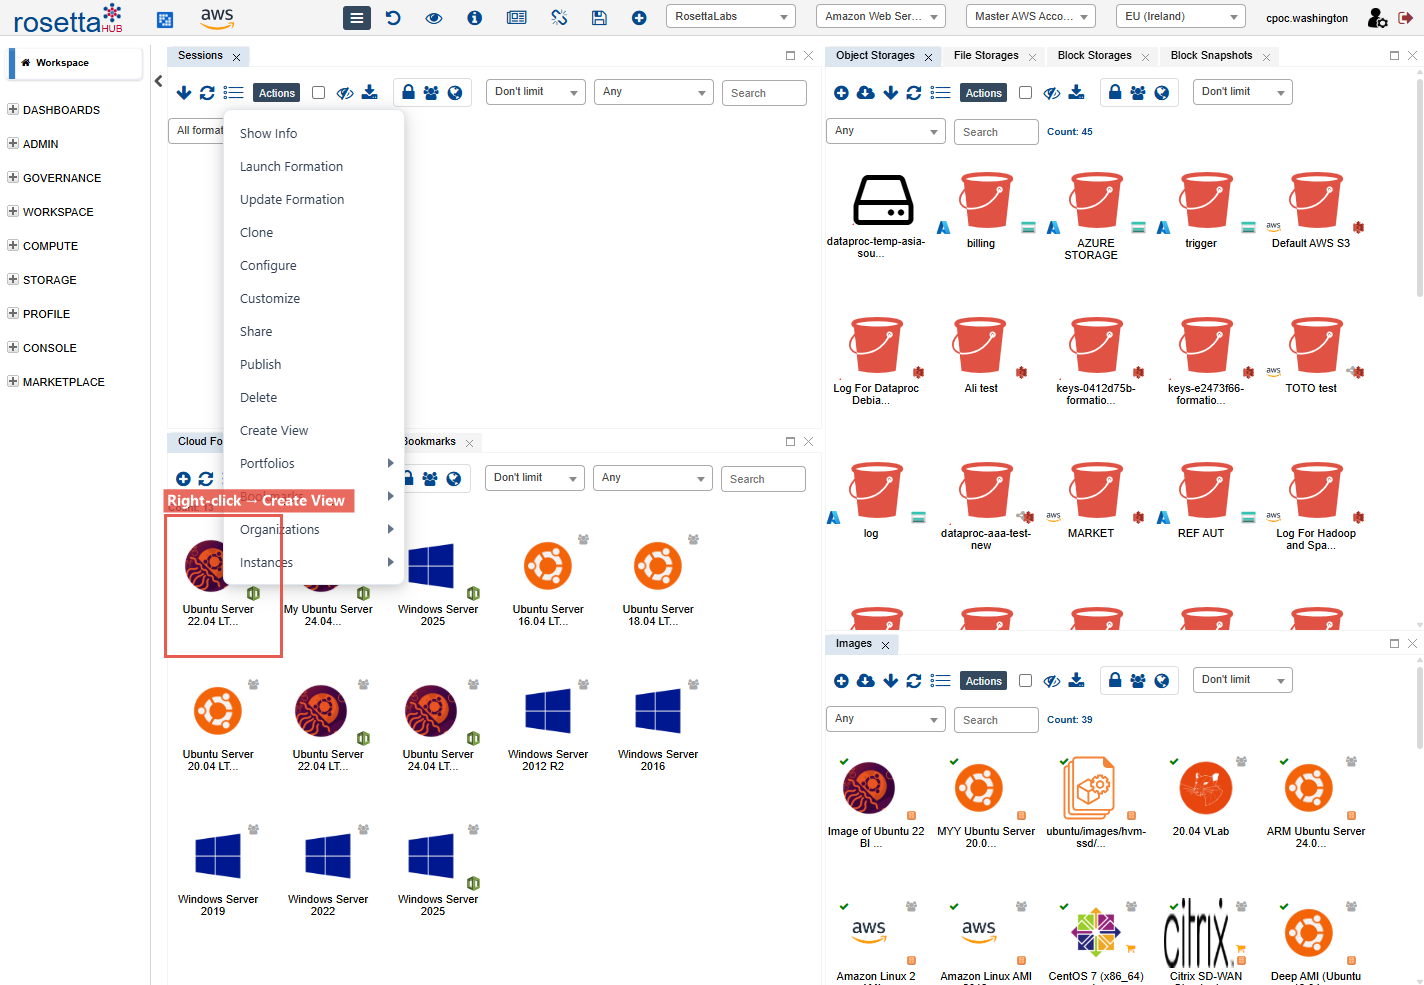
How to Create
- Right-click any artifact (a formation, image, cloud account, etc.)
- Select Create View from the context menu
- The view is created automatically and added to your layout
Artifact views are useful for:
- Pinning a specific formation or image to your dashboard for quick access
- Creating organization chart views from the Organizations list
- Building focused workspaces around specific resources
Info
Artifact views use the same iframe overlay technique as URL views. They load the artifact's detail page directly in the dashboard.
Managing Views
Update a View
Right-click a view in the Views list and select Update to change its label, type, or content.
Share a View
Right-click a view → Share to share it with users, groups, or organizations. When you share a perspective, all views inside it are automatically shared.
Delete a View
Right-click a view → Delete to remove it. This removes the view for all users it was shared with.
Saving Your Layout
After adding custom views, save your layout as a perspective so you can return to it:
- Arrange your views as desired
- Click Save As in the toolbar
- Enter a name and save
If you are working in the Workspace tab, your changes are automatically saved to your default layout.
Best Practices
URL View Tips
- Ensure the target site allows embedding (X-Frame-Options)
- Use HTTPS URLs for security
- Consider mobile responsiveness
HTML View Tips
- Keep HTML simple and lightweight
- Avoid external scripts for security
- Use inline styles for portability
Artifact View Tips
- Use artifact views to pin frequently accessed resources to your dashboard
- Combine artifact views with standard views in a custom perspective for focused workflows
Next Steps
- Perspectives -- Save your custom layout
- Dashboard Guide -- Full dashboard reference
- Views Reference -- Complete view catalog