Working with Perspectives
Overview
Perspectives save your entire dashboard layout -- which views are open, how they are arranged, and what filters are applied. This tutorial covers creating custom perspectives, managing views within them, and sharing perspectives with your organization.
For a tour of the built-in perspectives, see Getting Started.
Prerequisites
- [ ] RosettaHub account
- [ ] Completed the Getting Started tutorial
Understanding the Workspace
Workspace vs. Perspective Tabs
The left pane has two modes:
| Mode | Behavior |
|---|---|
| Workspace (first tab) | Your personal default layout. Any changes you make here are automatically saved. |
| Perspective tabs (below Workspace) | Read-only previews organized by category. Clicking a perspective tab shows its layout, but changes are not saved to your default. |
Info
To adopt a perspective as your default layout, select it from the perspective dropdown in the toolbar -- not from the left pane.
What a Perspective Captures
A perspective stores:
- View arrangement -- which views are open and where they are positioned
- View sizes -- how space is divided between views
- Tab groups -- which views are grouped into tabbed containers
- Active tabs -- which tab is selected in each group
- Filters -- search, visibility, and limit settings per view
- Global filters -- cloud, account, and region filters from the toolbar
Adding Views to Your Layout
Use the hamburger menu (☰) in the toolbar to add views:
- Click the ☰ menu in the toolbar
- Browse views organized by category (Formations, Compute, Storage, Admin, etc.)
- Click a view to add it to your current layout as a new tab
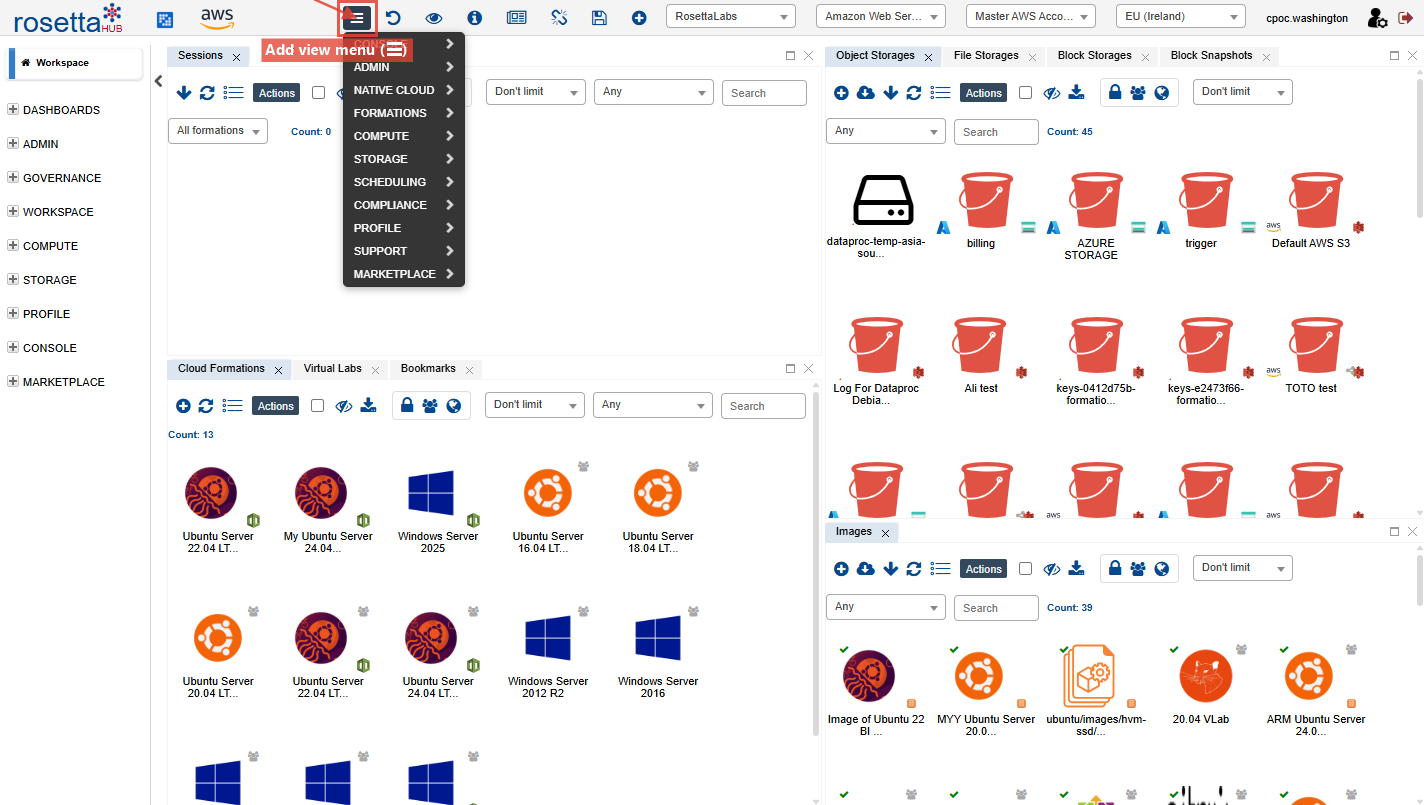
The menu only shows views available to you -- views you own, views shared with you, or views included in shared perspectives.
Info
Not everyone sees the same views. When a perspective is shared, all views inside it are automatically shared with the recipients. Contact your organization administrator if a view you need is not available.
Working with View Controls
Each view has built-in controls for interacting with its content.
Filtering
Type in the filter bar at the top of any view and press Enter to search. The filter searches across all visible properties -- labels, descriptions, types, and more.
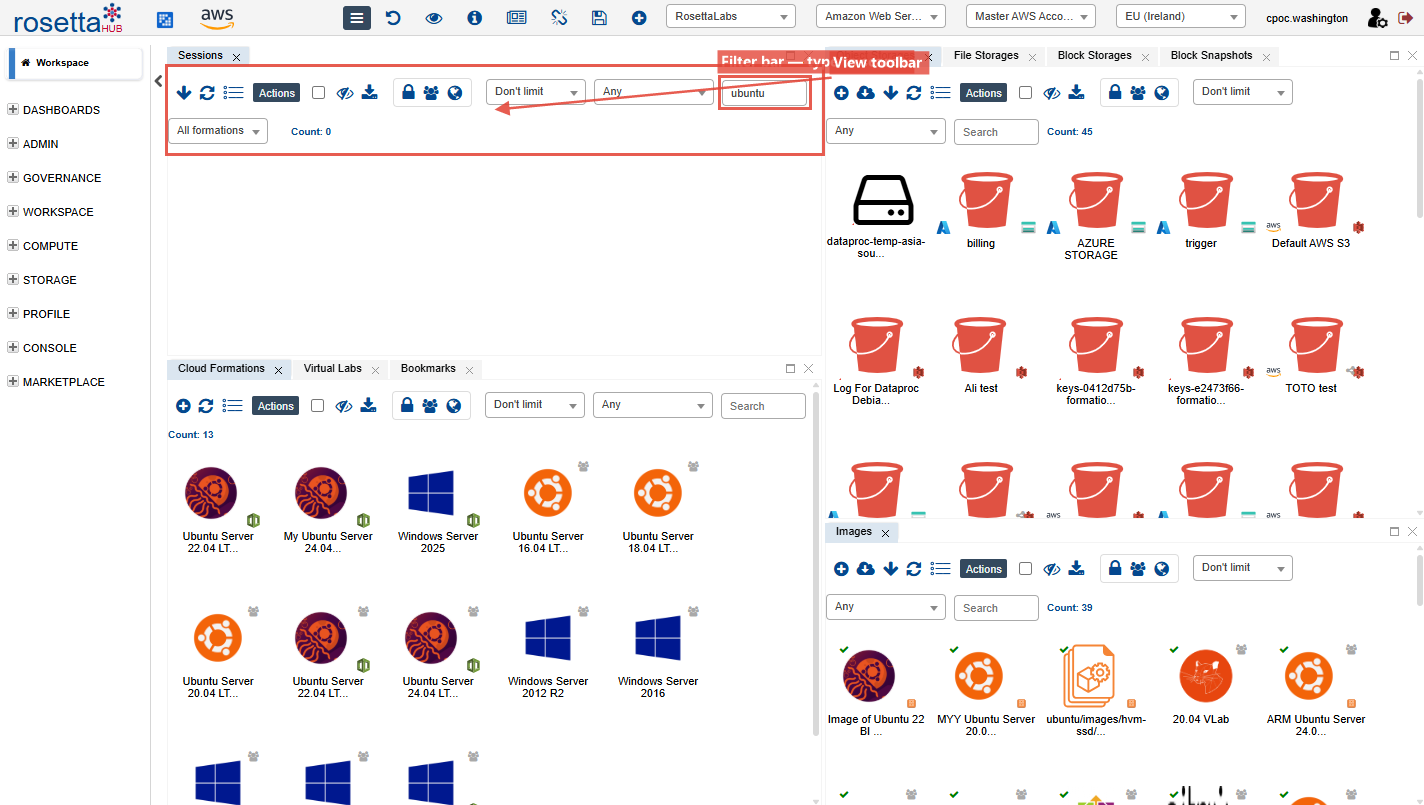
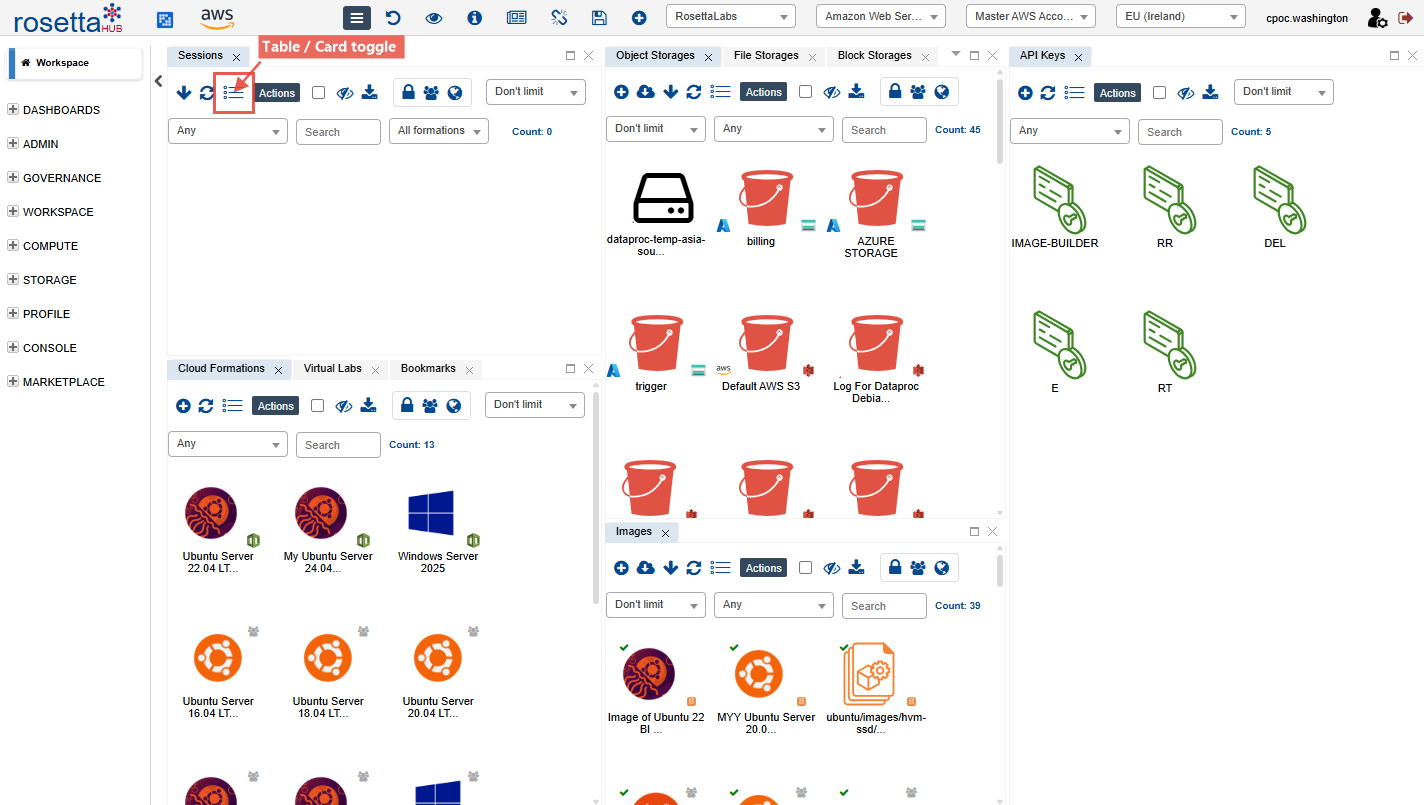
Table and Card Modes
Switch between Table mode (detailed rows with sortable columns) and Card mode (visual tiles with key information):
- Use the mode toggle in the view toolbar
- Table mode is best for scanning many items
- Card mode is best for visual identification
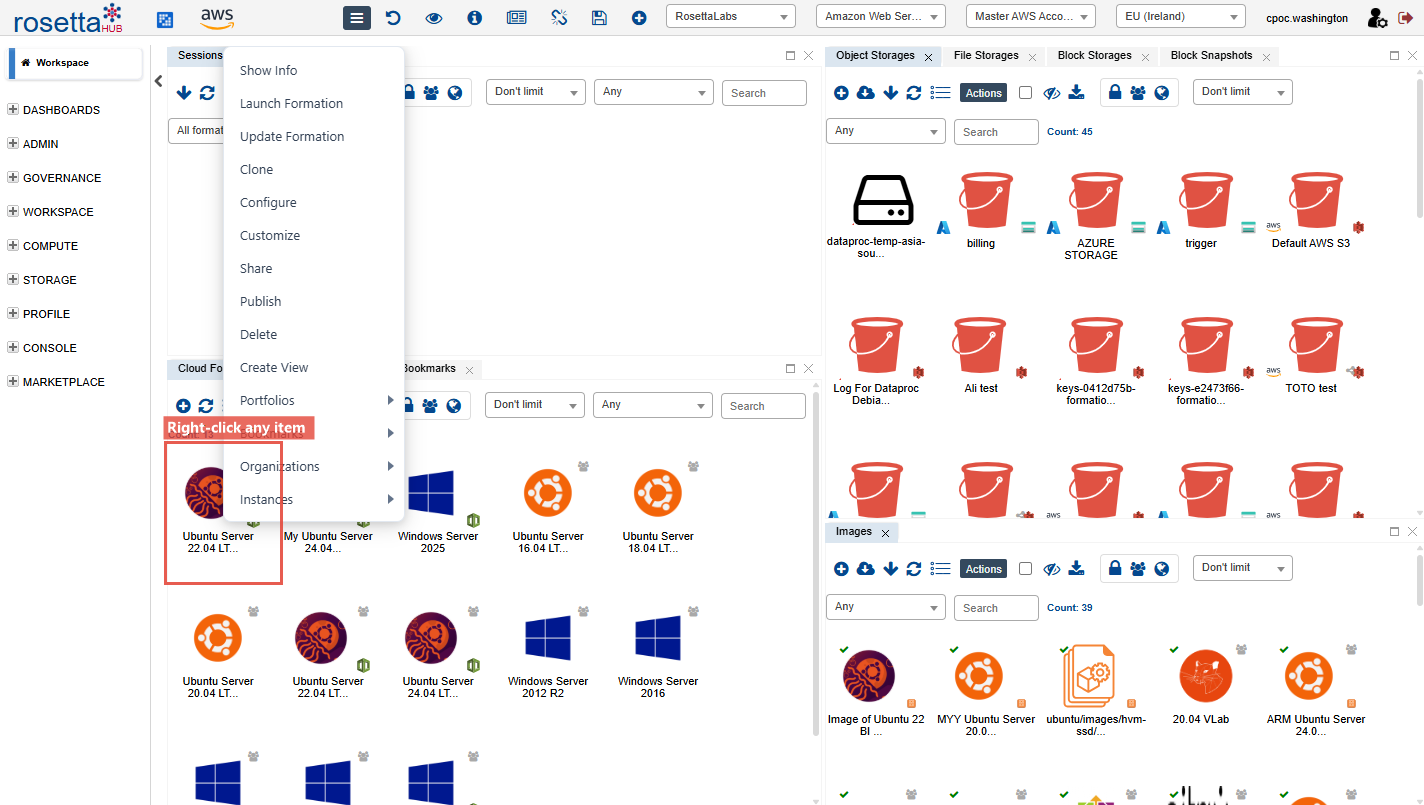
Context Menus
Right-click any artifact to see available actions:
- Launch, Stop, Terminate -- lifecycle actions for formations and sessions
- Share -- share with users, groups, or organizations
- Update -- modify properties
- Delete -- remove the artifact
- Add To Bookmarks -- pin for quick access
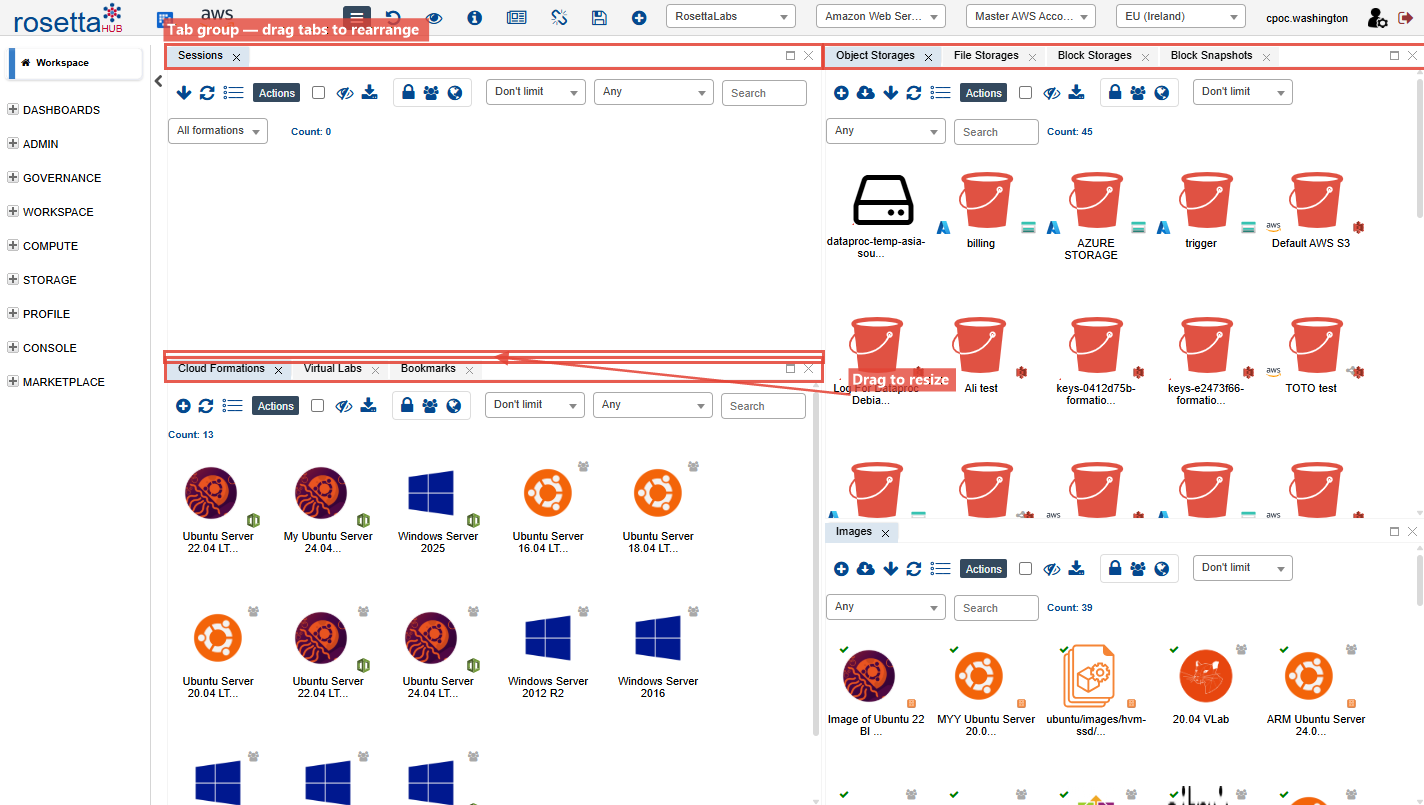
Arranging Views
Customize your layout by moving, splitting, and resizing views:
- Drag a view tab to rearrange its position
- Drop a tab on an edge of another view to split the area horizontally or vertically
- Drop a tab on the center of another view to create a tabbed group
- Resize views by dragging the borders between them
- Maximize a view by double-clicking its tab; double-click again to restore
Changes made in the Workspace tab are automatically saved. Changes in perspective preview tabs are not.
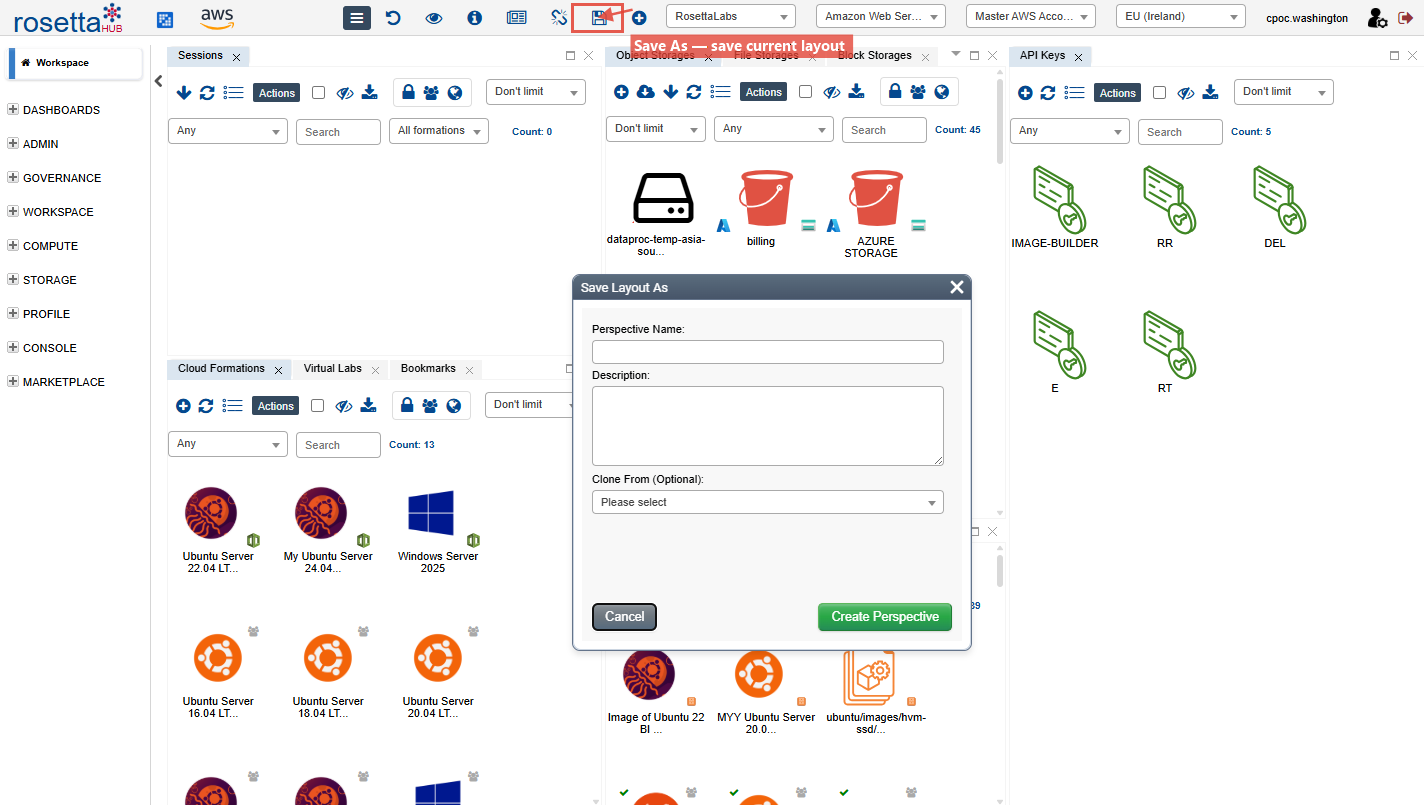
Creating a Perspective
Once you have your views arranged, save the layout as a named perspective:
Step 1: Save
- Click the Save As button in the toolbar
- Enter a descriptive name for your perspective
- Click Save
Tip
Use descriptive names that reflect the workflow: "Development", "Cost Monitoring", "Admin Tasks", "Compliance Review".
Step 2: Assign to a Category (Optional)
Place your perspective in a category so it appears in the correct section of the left pane:
- Right-click the perspective → Update
- Set the Folder Name to the category (e.g., "COMPUTE", "ADMIN", "DASHBOARDS")
- Set the Perspective Index to control its position within the category
- Configure display options:
- Side Menu Visible -- show/hide the left pane by default
- In Top Menu -- include in the toolbar perspective list
- Filters Bar Visible -- show/hide filter bars by default
- Show Details on Hover -- enable hover tooltips
- Auto Zoom -- auto-scale view contents
- Sync Mode -- synchronization behavior
- View Mode -- default card or table mode
Managing Perspectives
Update
To update the layout of an existing perspective:
- Modify your current layout in the Workspace
- Click Save to update the current perspective
To modify perspective properties:
- Right-click the perspective → Update
- Change properties: folder name, index, display options
Share
Share your perspective with others so they see the same layout and views:
- Right-click the perspective → Share
- Choose recipients: Users, Groups, or Organizations
- Set access level
- Confirm
When a perspective is shared, all views inside it are automatically shared with the recipients. This is how organization administrators control which views are available to their users.
Delete
- Right-click the perspective → Delete
- Confirm deletion
Warning
Deleting a perspective removes it for all users it was shared with.
Organization Perspectives
Organization managers can:
- Set a Default Perspective -- enforce a default for all users so new members start with a curated workspace
- Share Perspectives -- distribute perspectives to the organization
- Assign Categories -- organize perspectives into meaningful folders
- Control Index -- order perspectives within categories for logical navigation
Best Practices
Organization
- Create perspectives for each role or workflow
- Use descriptive names that reflect the perspective's purpose
- Assign perspectives to the appropriate category via folder name
- Set perspective index for logical ordering within categories
Sharing
- Test perspectives before sharing with the organization
- Set a default perspective for new users to provide a guided onboarding experience
- Keep shared perspectives stable -- frequent changes affect all users
Views
- Use the filter bar to narrow results before scanning
- Switch to Table mode for dense data, Card mode for visual browsing
- Right-click artifacts for all available actions
- Bookmark frequently used artifacts for quick access across perspectives
Next Steps
- Custom Views -- Add URL and HTML views to your perspectives
- Perspectives Reference -- Complete reference
- Views Reference -- Full view catalog